|
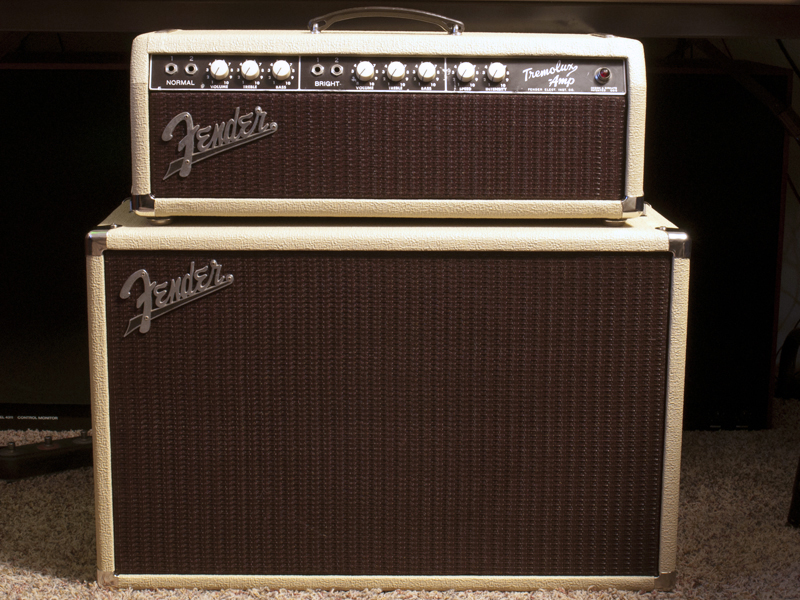
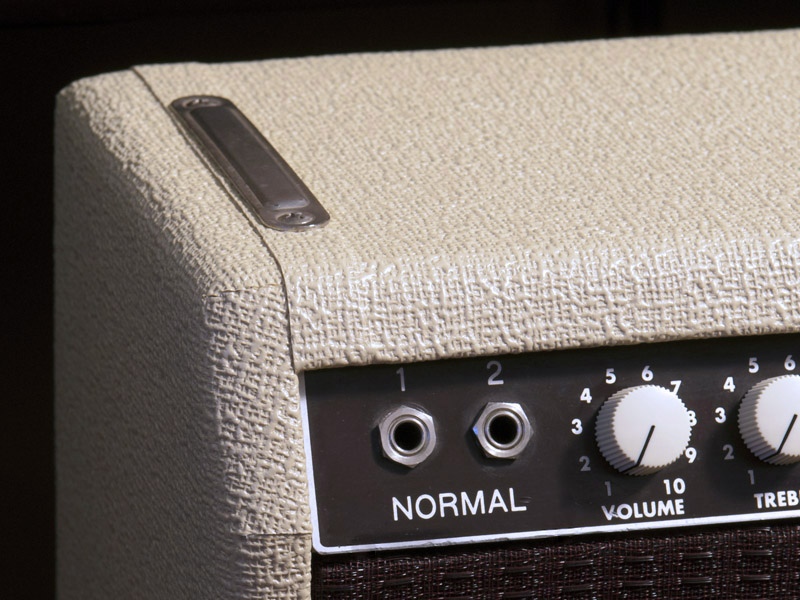
Fender Tremolux Restoration |
|
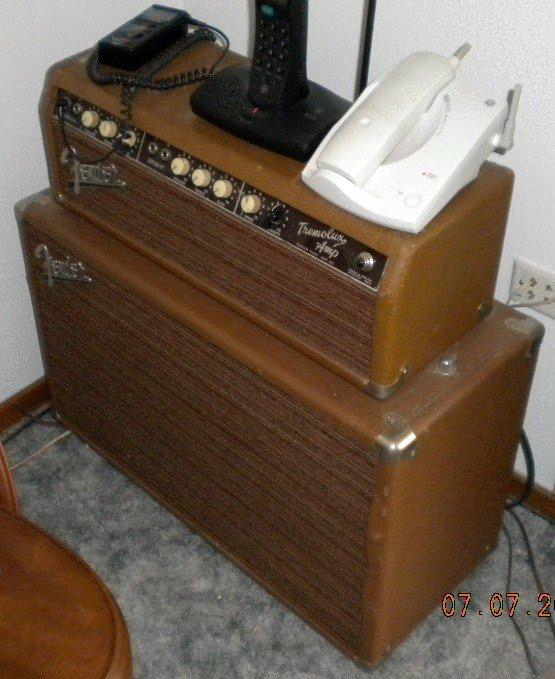
I restored a 1961 Fender Tremolux amplifier with new cream Tolex and Oxblood grill cloth. This is the only "before" picture I have of the amplifier recovered in a generic brown vinyl with hi-fi grill cloth and the tilt legs and glides removed.
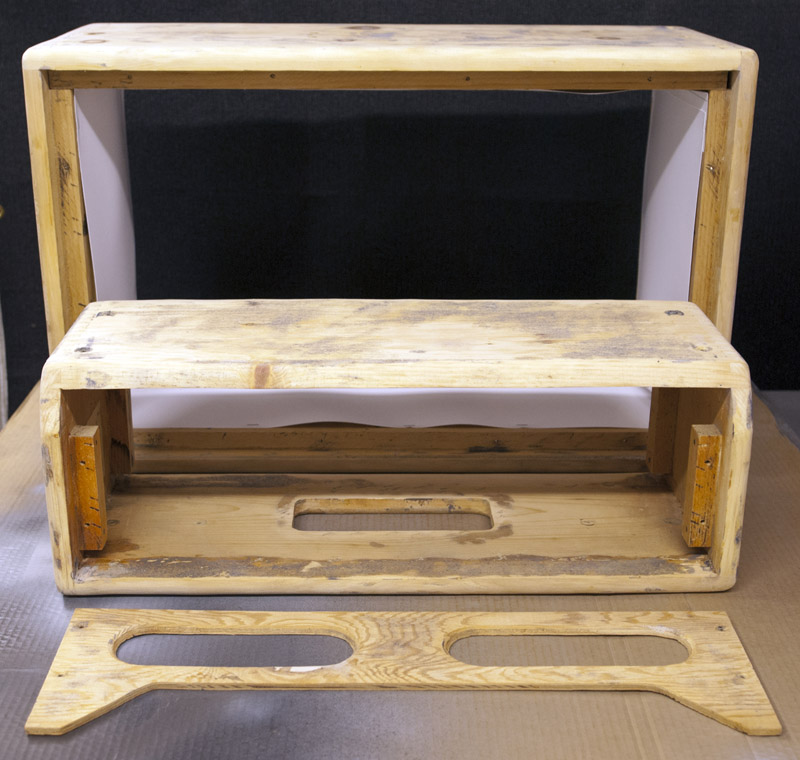
It took about 8 hours to totally strip, sand, and fill all the pieces. Here are some of the cabinet pieces prepped and ready for new Tolex. I covered the fiberglass insulation with paper sheets while working on the speaker cabinet to keep the fiberglass better contained.
The amplifier and speaker cabinet came out very nice. I use two coats of glue on each surface so it took about 90 minutes clock time to glue and cover each piece. Each cabinet takes about 6 hours to install the Tolex, grill cloth, and hardware. I made tracing of all the mounting holes so I could find them through the new Tolex.
I updated the amplifier with a grounded power cord and removed the line capacitor. Note this amplifier is prior to the use of a Standby switch.
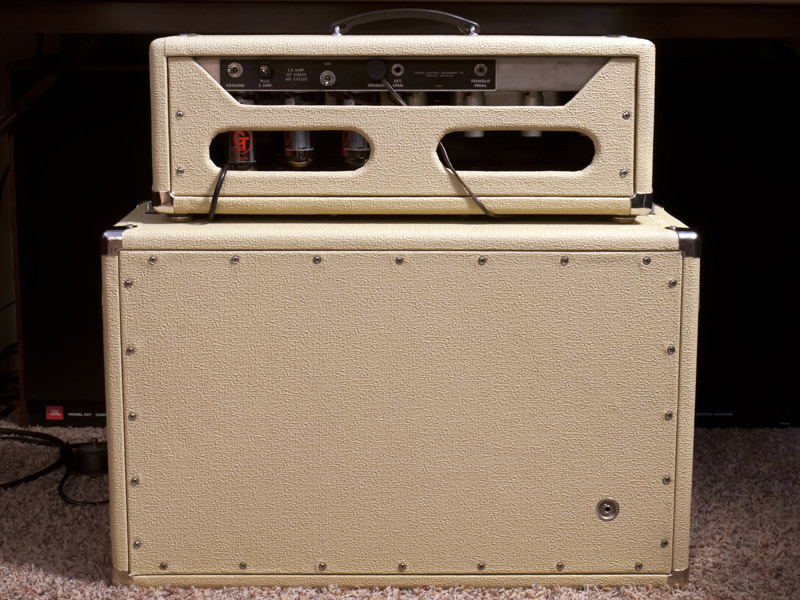
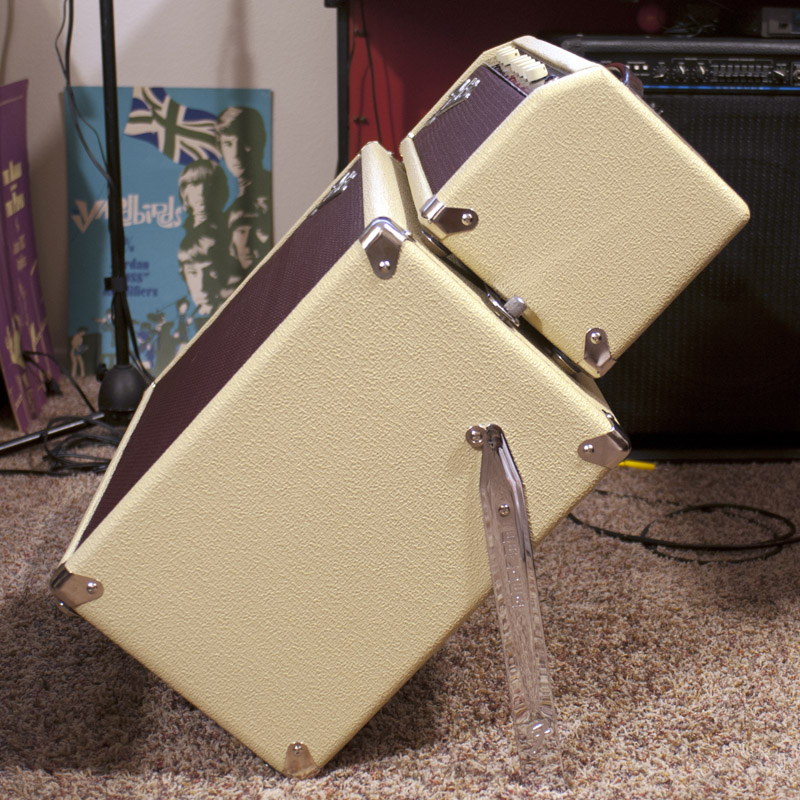
And of course the famous tilt-back legs on this vintage amplifier. In the background are two 1960's posters for Jordon "BOSS" amplfiers. Has anyone actually ever seen a Jordon "BOSS" amplfier?
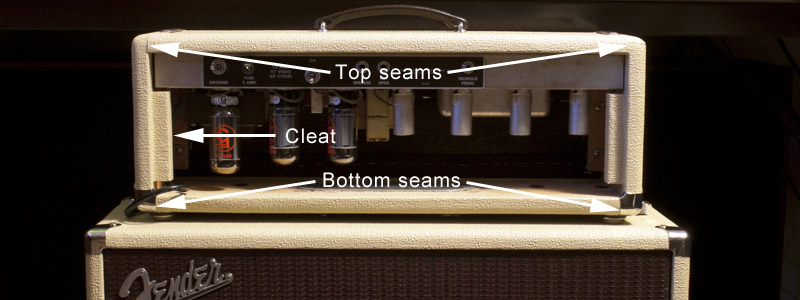
The 1961 Fender speaker cabinets used the large dogbone handle so there is a recess cutout of the bottom of the amplifier. I pieced in each of the four corners and also covered the bottom of the metal plate with Tolex for a more finished look. I chose not to staple the bottom seams as Fender did since this amplifier is for home use. I also mounted the sphinx glides in the same holes as the wrap around corners as Fender did in later years.
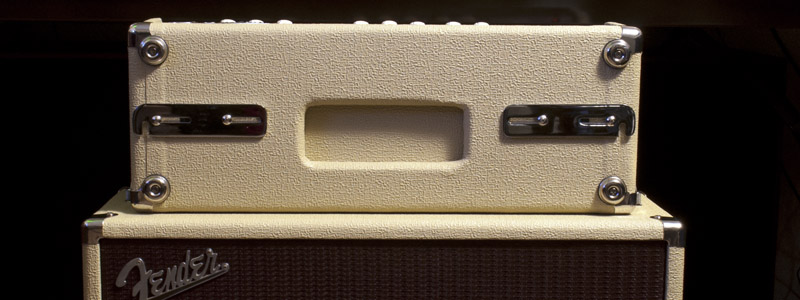
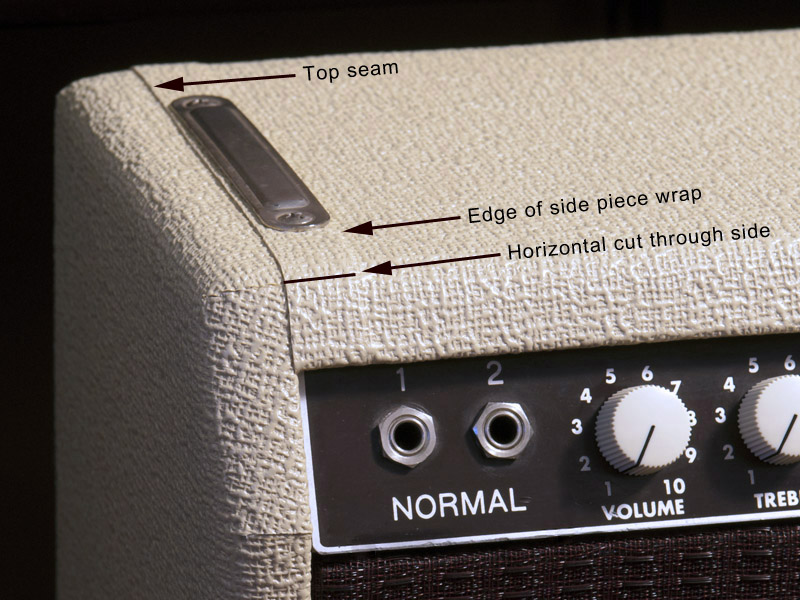
The top four corners on the amplifier do not have covers so the cuts have to be made very precise. These came out perfect.
|
Before |
After |
|
|
Electronics
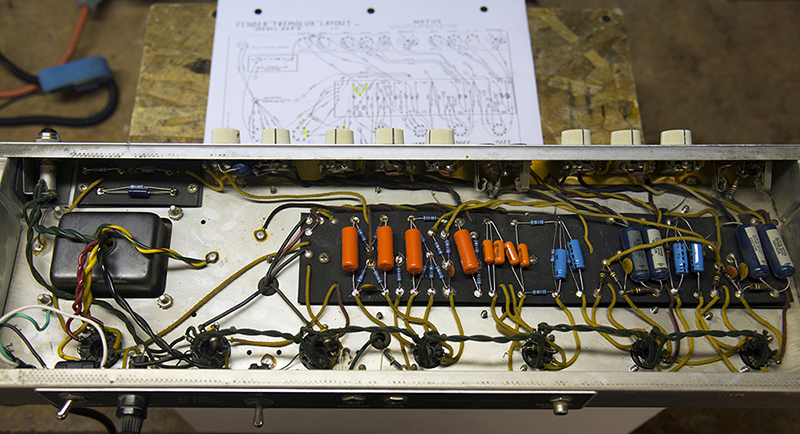
After I had restored the cabinet the owner asked me to restore the electronics as he was having some crackling noise. I have found this is typically caused by corrosion in the tube pins and sockets and noisy carbon resistors in the plate circuits. I recommended he replace all the capacitors and resistors. I chose "orange drop" capacitors and metal film resistors because I like their performance. In this photo I am about 50% complete with the parts replacement.
Tolex Application Technique
I know photos would help, but I didn't want to stop and take pictures while I was doing this project. I've looked at various sites and youtube videos but most just show putting the material on and hacking it off with scissors. Here are my notes of how I apply Tolex.
Seams and Planning:
I generally follow a Fender methodology for seams along the top and bottom
edges on any cabinet I am recovering. If I use wider material I can sometimes do both sides and the top in a single piece so I only have seams on the bottom.
Obviously for a Fender I recover in the same style as the original which is to apply the sides first and then the top and bottom. It is important to determine what kind of corners you will have: exposed, covers, or wrap-around covers. This determines how you will cut the corners. If you are doing a wrap-around (e.g. no seam) then you have no choice but to cut the corners at 45 degrees. If you have a seam at the corner, you can either cut 45 degrees or you can do a Fender-style horizontal cut. I usually do the
latter even if the corners are covered. I use a #11 X-acto blade for all cuts.
I make tracings of where all the holes (e.g. handle mounts, tilt legs, etc.) are so I can find them through the Tolex. I use a sharp awl to poke through the tracing into the Tolex. You can use speaker boards and cabinet backs as the template to find all those holes.
Preparation and Materials:
I use a water-based Tolex glue, which is just a water-based contact cement. Petroleum-based contact cements will 'stretch' the Tolex making it more difficult to
work with. The surfaces must be flat, clean, and dry. Minor holes or cracks won't show but dents
will so you need to fill and prepare all surfaces. I generally use masking tape to define all my edges where I will be cutting the Tolex. That keeps the wood clean from excess contact cement and gives me a good edge to trim to.
I use two coats on all surfaces and allow 30+ minutes for each coat to dry. The
glue takes longer to dry on the Tolex than on the wood so I usually use a heat lamp over the Tolex to help it dry.
On some large cabinets and Rhodes I have used tonneau material which looks exactly like the black Tolex. The advantage is it is less expensive and comes in 84" width so you can have fewer seams. Make sure it is not too thick as some tonneau material is really rugged.
Installing sides:
I generally cut the pieces about 1" larger than I need on all sides. I lay the piece down and set the cabinet on top of it, get it centered, and then make marks at each of the corners so I know how to center the piece. When the glue is
dry I just set the cabinet on top of the Tolex aligned to my marks. I start by
folding the sides over first. Then I make my horizontal cut at the corner, fold the top down, and then cut the Tolex about 1/8" too long at
this corner cut. I find that if I get most of the material out of the way first I can make more accurate cuts.
Then I carefully cut the excess material off starting at the corner. If your first cut was absolutely straight, the top cut will have a slight curve to it at the corner to butt flush.
After all four corners have been cut, I then wrap the Tolex onto the side and over the face of the cleat (in the case of an amplifier or speaker cabinet). I use a small putty knife and hold the Tolex away from the cleat working it into the inside corner of the cleat. I trim the inside of each of the four corners and then cut the excess material away. If there is a cleat you can just run your knife along the edge of the cleat to cut the Tolex off. If there is no cleat then I trim the Tolex back to the edge of the masking tape. I lift the Tolex off the masking tape that I used to define my edge and make a slit right at the edge of the masking tape on both ends. I use a straightedge and align it to my slits and cut the excess material off. Then I remove the masking tape and I have a perfect edge. I do the edges on the top and bottom the same way.
Installing top and bottom:
I never trust pre-cutting a piece to the exact size. I mask the Tolex on the edges of the sides and line up the top first seam. I use a piece of masking tape on top of the Tolex and mark it to the masking tape on the cabinet so I know how to center the top piece. I cover the top contact cement with waxed paper leaving a gap of about 3/4" to the Tolex. I can then set the side down without it sticking, align the marks, and lay the first seam. I roll it very well so it forms down to the cabinet with a nice sharp edge over the
underneath Tolex. I then lift the top Tolex, remove the waxed paper and place it over the other end so it covers the top by about 1.5" (the 3/4" Tolex and 3/4" of
exposed top) and roll the top flat. I then find the edges of my masking tape for the other seam and make slits. I slip a thin piece of sheet steel between the waxed paper and the Tolex and cut that
seam edge straight. Then remove the steel and waxed paper and roll the top flat. I trim the remainder of the material the same way as the sides.