 |
Boops Card 12 Replacement |
|
For all its great features and performance, the reverb on the Easel is pretty lousy. Don used an LM380 to drive the reverb with voltage and the wet/dry mix is not very good. I've never been satisfied with it but haven't found the time or energy to do much with it. At a minimum you can change the Reverb potentiometer to a log feel by adding a resistor between the wiper and the inside pad with a value of 10% of the potentiometer, so 4K7 for a 50K potentiometer.
Don also used LM380s to drive each headphone channel although the module is mono. Each of the final outputs is also driven by a separate op-amp but again since the module is mono, each jack is the same.
I decided to purchase a replacement Card 12 as designed by Boops on Muffwiggler and described in the New Buchla Card 12 thread. This design is form, fit, and function compatible with the original Card 12 although there is a minor modification on the motherboard to improve the reverb wet/dry mix.
The reverb circuit is a better design by driving the tank with current instead of voltage by placing it in the feedback loop of an op-amp. The reverb drive is a low impedance so the current drive of the op-amp has to be increased with external transistors. Like the original, the card provides a separate op-amp for each of the final outputs so with additional motherboard modifications the second final output jack can be used for bringing out the MO or CO separately.
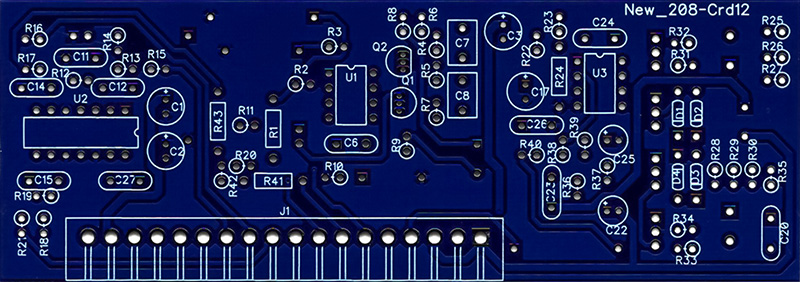
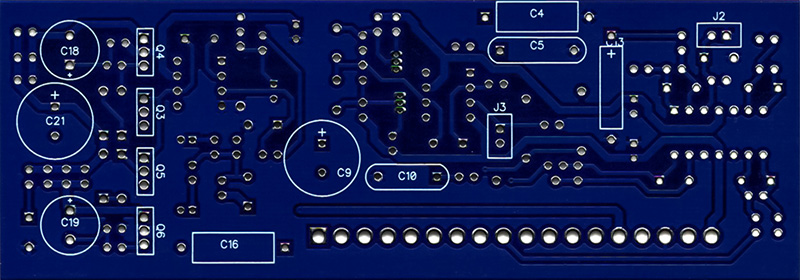
Components mount on both the front and rear.
A Mouser BOM is available on the New Buchla Card 12 thread but I decided to change a number of the parts.
Construction
Construction is straightforward. There is room on the front for C4, C5, and C10 for the parts I selected.

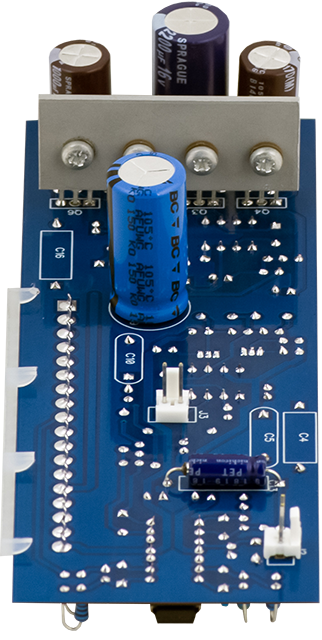
I made my heat sink 42mm x 18mm out of 0.050" aluminum and painted it as that lowers the thermal resistance. The four holes for the transistors are 7mm from the bottom edge on 10mm centers. The 7721-7PPSG shouldered washers are a close fit for a 4-40 screw and require a 0.1350" hole so I used a #29 0.136" drill.
The SP2000-0.015-00-58 insulator is made for a TO-220 package and is 12.7mm wide. I trimmed 1.35mm off both edges of the inner two insulators and off one edge of the outer insulator (Q6 requires no insulator). I used a small amount of heat sink grease on both sides. I loosely mounted the four transistors and then lined up the leads in the PCB and inserted and soldered the transistors. Then I tightened the mounting screws.
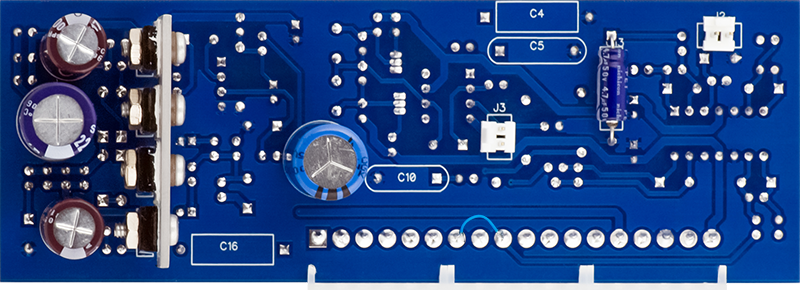
Since I didn't bring out the MO or CO oscillator to the Final Output jack I jumpered edge pins 7 and 9.
Motherboard Modifications
The recommended modification to improve the reverb wet/dry mix is to remove R73 on the motherboard, jumpering two pads, and adding a 10K resistor as shown.

I used a 50K potentiometer instead of 10K for the Reverb control. The mix wasn't too bad but I wanted the reverb to come on less in the initial 1/2 rotation. I simply added a 10K resistor to change the contour of the control.
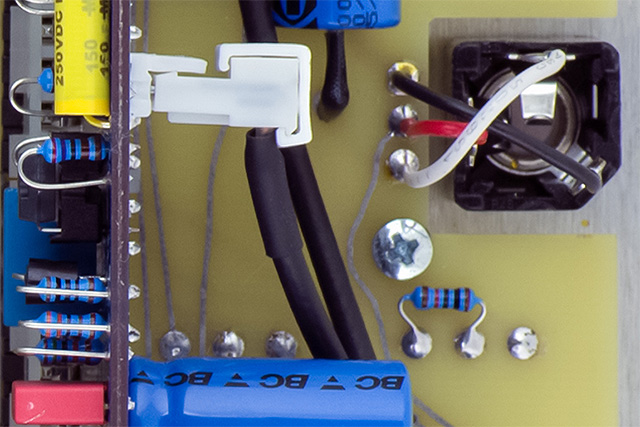
I do like it as the reverb is definitely an improvement. While I had my 208 on the bench I went ahead and made all the improvements I have come up with repairing others. This photo shows the new Card 12 and the wiring to the reverb tank.
